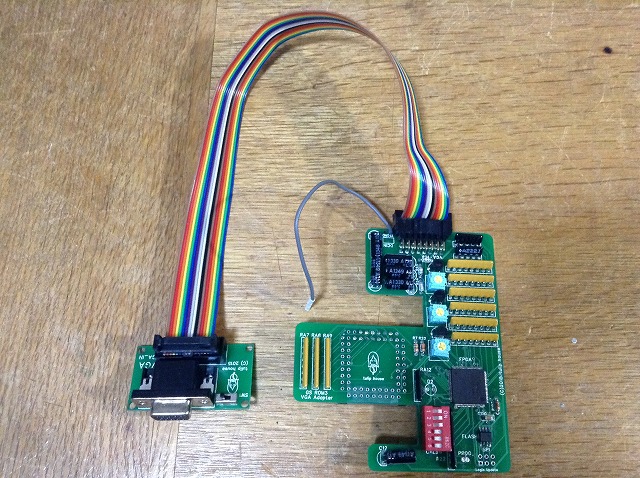
Apple II GS ROM3 を、VGA モニタに接続するためのアダプタです。GSの画面モード、IIeコンパチの画面モード、両方のピクセルクロックに対応しており、安価な VGA モニタで美しい画面を表示できます。
This is an adapter to connect a VGA monitor with an Apple II GS ROM3. This supports both GS screen mode and IIe compatible screen mode, and can display beautiful image with a cheap VGA monitor.
This adapter only supports Apple II GS ROM3. You can't use this with an Apple II GS ROM0/1.
このアダプタは Apple II GS ROM3 のみをサポートしています。Apple II GS ROM0/1 では使えません。

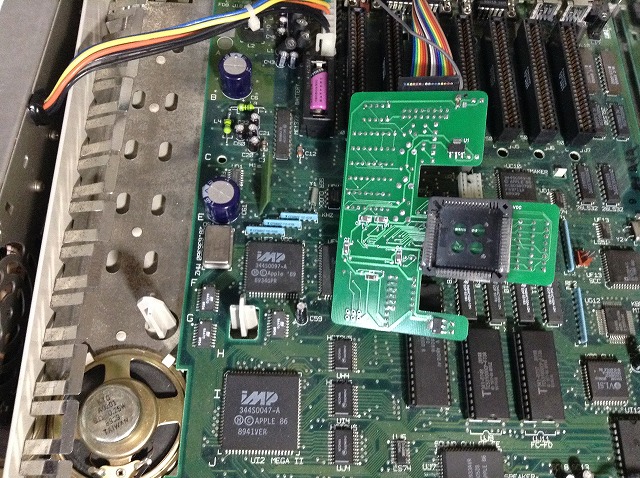
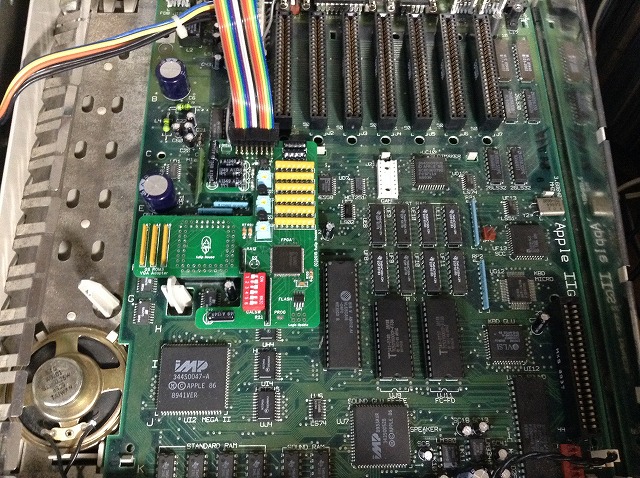
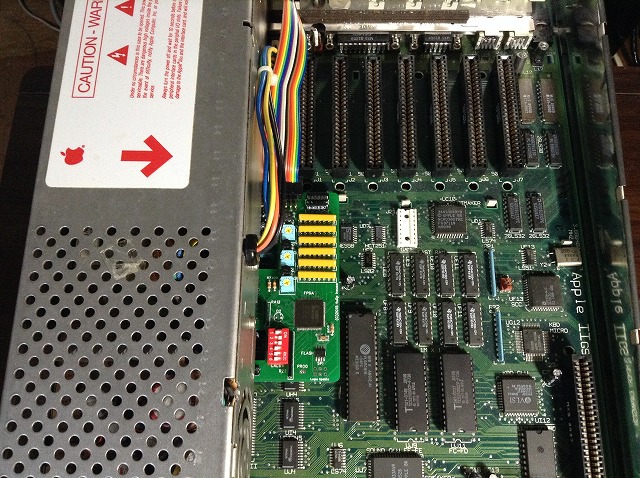
Plug the adapter on the VGC chip (UF2) on the logic board. Push the tulip house logo and confirm that the adapter is fixed firmly.
Don't peel the tape on the PLCC connector off. This tape enables the adapter fixed firmly.
ロジックボード上のVGCチップ (UF2) の上にアダプタを装着します。tulip house のロゴマークを押して、アダプタがしっかりと固定されているか確認して下さい。
PLCCコネクタに貼ってあるテープを剥がさないでください。これにより、アダプタがしっかりと固定されます。
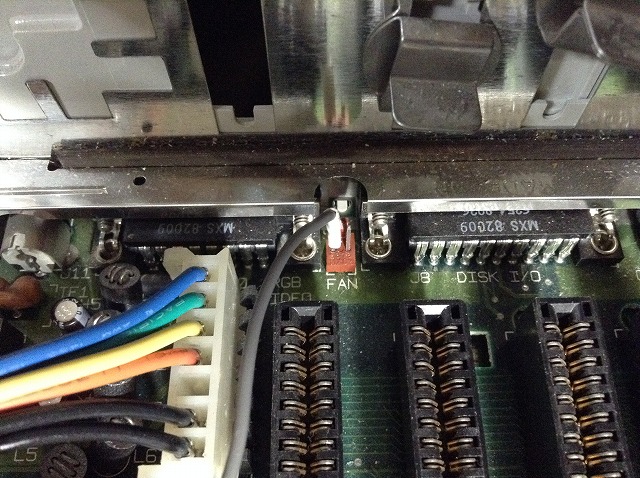
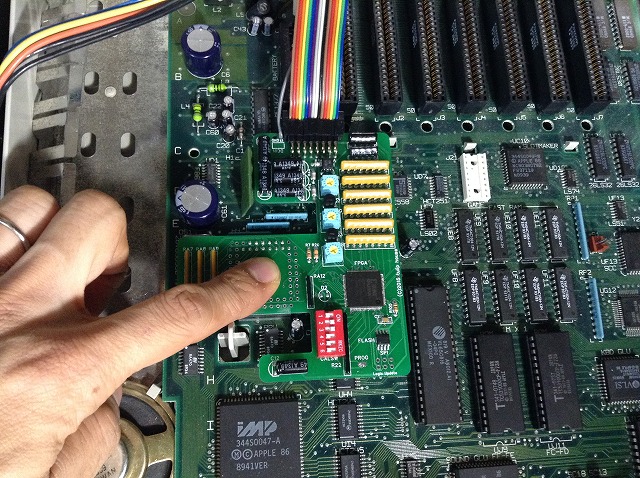
Connect the power plug (red or gray wire) with the left pin of the FAN connector on the logic board.
電源プラグ (赤または灰色の線) を、ロジックボード上の FAN コネクタの左側のピンと接続します。
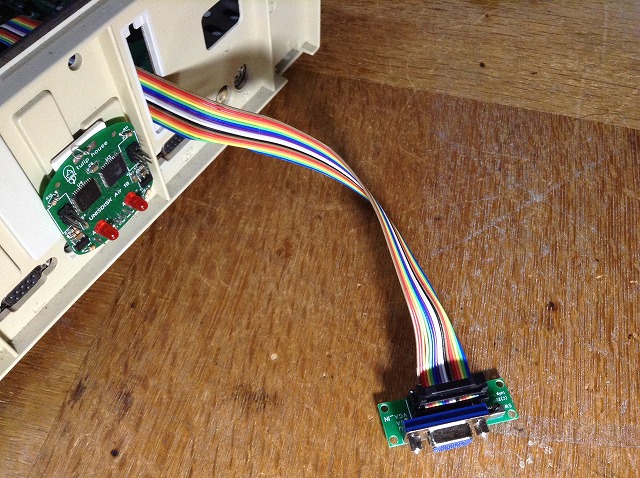
Connect the flat cable with the VGA connector mini board. And connect a VGA monitor with the VGA connector.
フラットケーブルを VGA コネクタ・ミニボードと接続します。最後に VGA モニタをその VGA コネクタと接続します。
This time calibration is done by SW1-2.
Try 00, 01, 10, 11.
SW3 is used to filter GS mode screen. If you prefer filtered images, turn the SW3 on.
SW4, 6 should be 0.
キャリブレーションは SW1-2 で行います
00, 01, 10, 11 のどれかをお試し下さい。
SW3 は、GS スクリーン・モードで画面をフィルタリングするのに使用します。フィルターを通した画面をお好みの場合、SW3 を ON にして下さい。
SW4-6 は 0 にして下さい。
Calibration is done by SW1-3.
Try 100, 010, 110, 001, 101 or 011.
SW4-5 should be 0.
キャリブレーションは SW1-3 で行います
100, 010, 110, 001, 101, 011 のどれかをお試し下さい。
SW4-5 は 0 にして下さい。
SW1- 5 should be off/on/on/off/off. But try other setting (like on/on/on/off/off) when the image is not beautiful.
SW1- 5 を off/on/on/off/off として下さい。画面が美しくない場合、別の設定 (on/on/on/off/offなど) をお試し下さい。
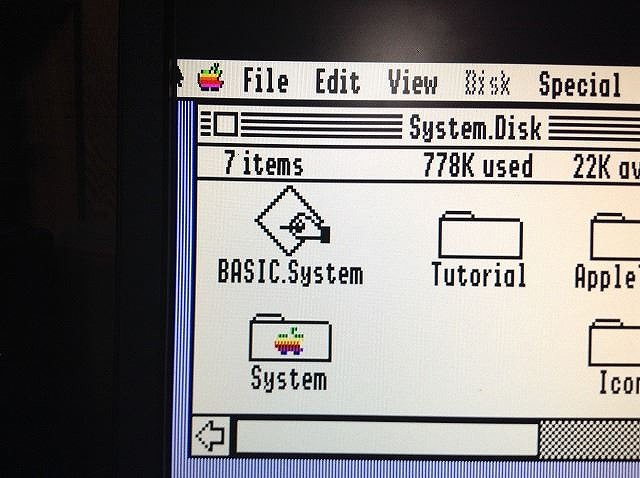
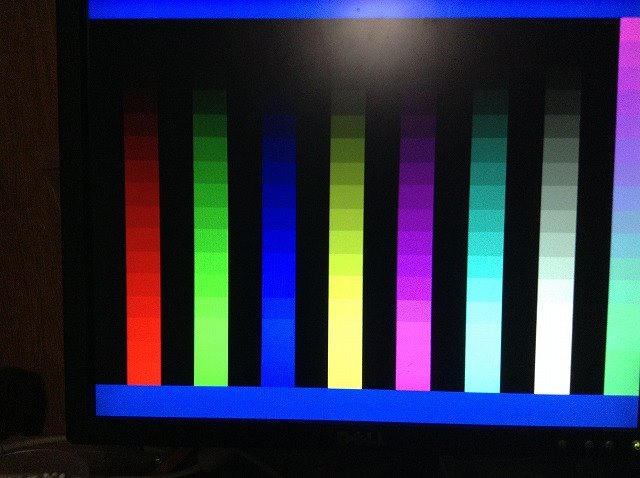
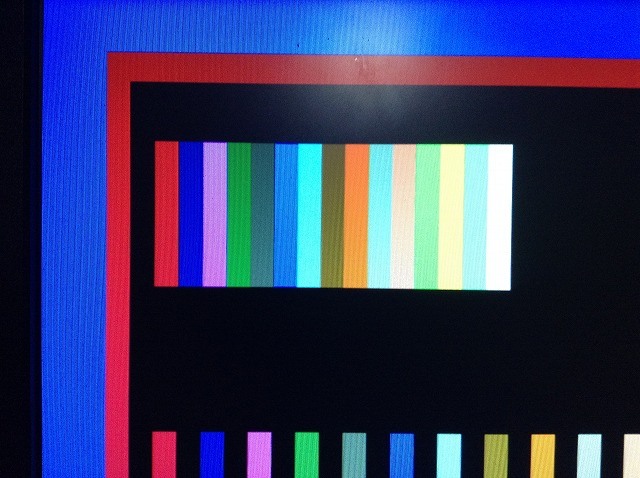
Boot the GS OS, and change the SW1 - 4 of the DIP switch so that the screen is stable and stripes on the background is dsiplayed beautifully. (I'm glad if you let me know the 4 bit value of the switches when the adapter works stably with your Apple II GS ROM3.)
GS OS を立ち上げて、DIP スイッチの SW1 - 4 を変えて、画面が安定し、バックグラウンドの縦のストライプが美しく表示されるようにします。(アダプタがお使いの Apple II GS ROM3 で安定して動作するスイッチ設定の4ビットの値をお知らせ頂けるとありがたいです。)
When the SW6 (SW5 for 2017 model) of the DIP switches is OFF, the adapter runs in auto detection mode, and the sampling frequency is selected automatically from either 16.363 MHz (GS screen mode) or 14.318 MHz (IIe compatible screen mode).
DIP スイッチの SW6 (2017 モデルでは SW5) が OFF の時、アダプタは自動検出モードで動作し、サンプリング周波数が 16.363 MHz (GS 画面モード) と14.318 MHz (IIe コンパチ画面モード) に自動で切り替わります。
Since this auto detection is not perfect, you can also use the adapter in manual mode by making the SW6 (SW5 for 2017 model) of the DIP switches ON. In manual mode, you can select sampling frequency by changing the switch on the VGA connector mini board.
この自動検出は完璧ではないので、DIP スイッチの SW6 (2017 モデルでは SW5) を ON にすることでマニュアルモードで使うこともできます。マニュアルモードでは、VGAコネクタ・ミニボードに付いているスイッチを変えることでサンプリング周波数を選択できます。
When the adapter is running in auto detection mode, the switch on the VGA connector mini board is used for displaying scan lines.
自動検出モードで動作している場合、VGAコネクタ・ミニボードに付いているスイッチは、スキャンラインを表示するために用いられます。
George Rentovich for offering Apple II GS ROM3 logic boards.
Dagen Brock for making a display test program for Apple II GS.
Herbert Fung and Antoine Vignau for reporting the behavior of the 2015 model.
Atsuhiro Suzuki for offering an Apple II GS and testing the 2016 model.
People in Apple II community.